Words and images by Dave Lynch
I’ve had a few shots in my mind for Glencoe for ages so when it was clear that conditions were going to be phenomenal over a few days in December – a high pressure was sitting over Scotland with freezing conditions predicted and clear skies – I negotiated a pass, packed my gear and headed over to the west coast with a load of ideas in my head; classic landscape shots, star trails, light trails, cloud inversions, sunset, sunrise and the moon …. Only thing missing was the Milky Way, but in December the best part is below the horizon and the moon was also about 70% full so it was going to be too bright to pick out Milky Way detail anyway.
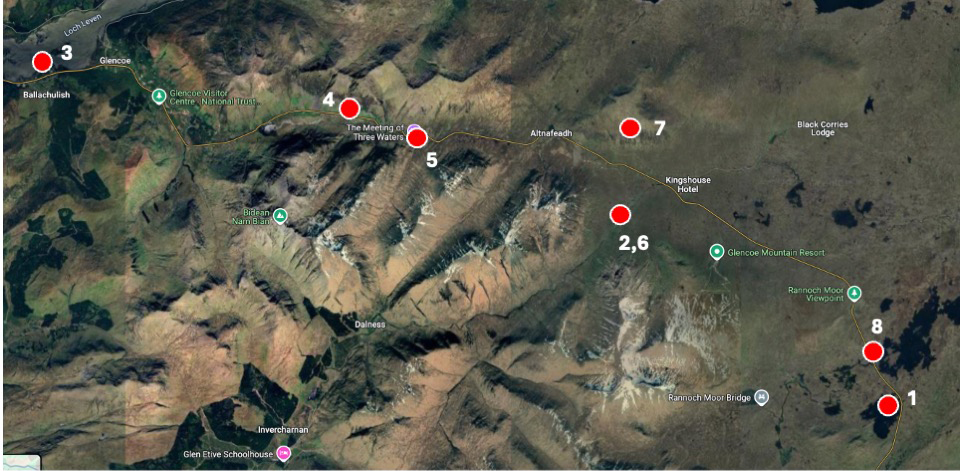
I visited 8 locations in 24 hours in a madcap effort to chase the light. The locations are shown on the map. I’ve also included some detail on making the light trails image which you may find useful.
Chasing the light and the eight locations
In winter there’s not a lot of time to use the sun and this is amplified in areas with mountain scenery as the sun doesn’t get particularly high in the sky, so it quickly hides behind hillsides, plunging much of the landscape into shade. It’s important to use the sun when it is up and to try and predict where it might be and what parts of the landscape might be illuminated and what parts might be in shade.

The majority of Glencoe is in shade in winter for the entire day so I focused on finding locations around the edge of the glen or where I thought the sun might catch some of the mountains. PhotoPills can be a useful help for this. There is an Augmented Reality feature which you can use to see when the sun will be high enough to shine on your subject. Here’s an example of me using it at a location which was in shade, and I wanted to know when it might be illuminated. So, have a look at the screengrab from PhotoPills. The subject is behind me, to the west and I’ve pointed my phone to the south-east. The yellow line is the trace the sun was going to follow the next day. You can see times along the line which tell us that the sun would be above the hill at 10.00 and looked like it was disappearing behind another hill at 11.00. So only a one-hour window to shoot the subject in sunlight. Really useful.
Here are a few shots that I captured after trying to understand where the light might be.
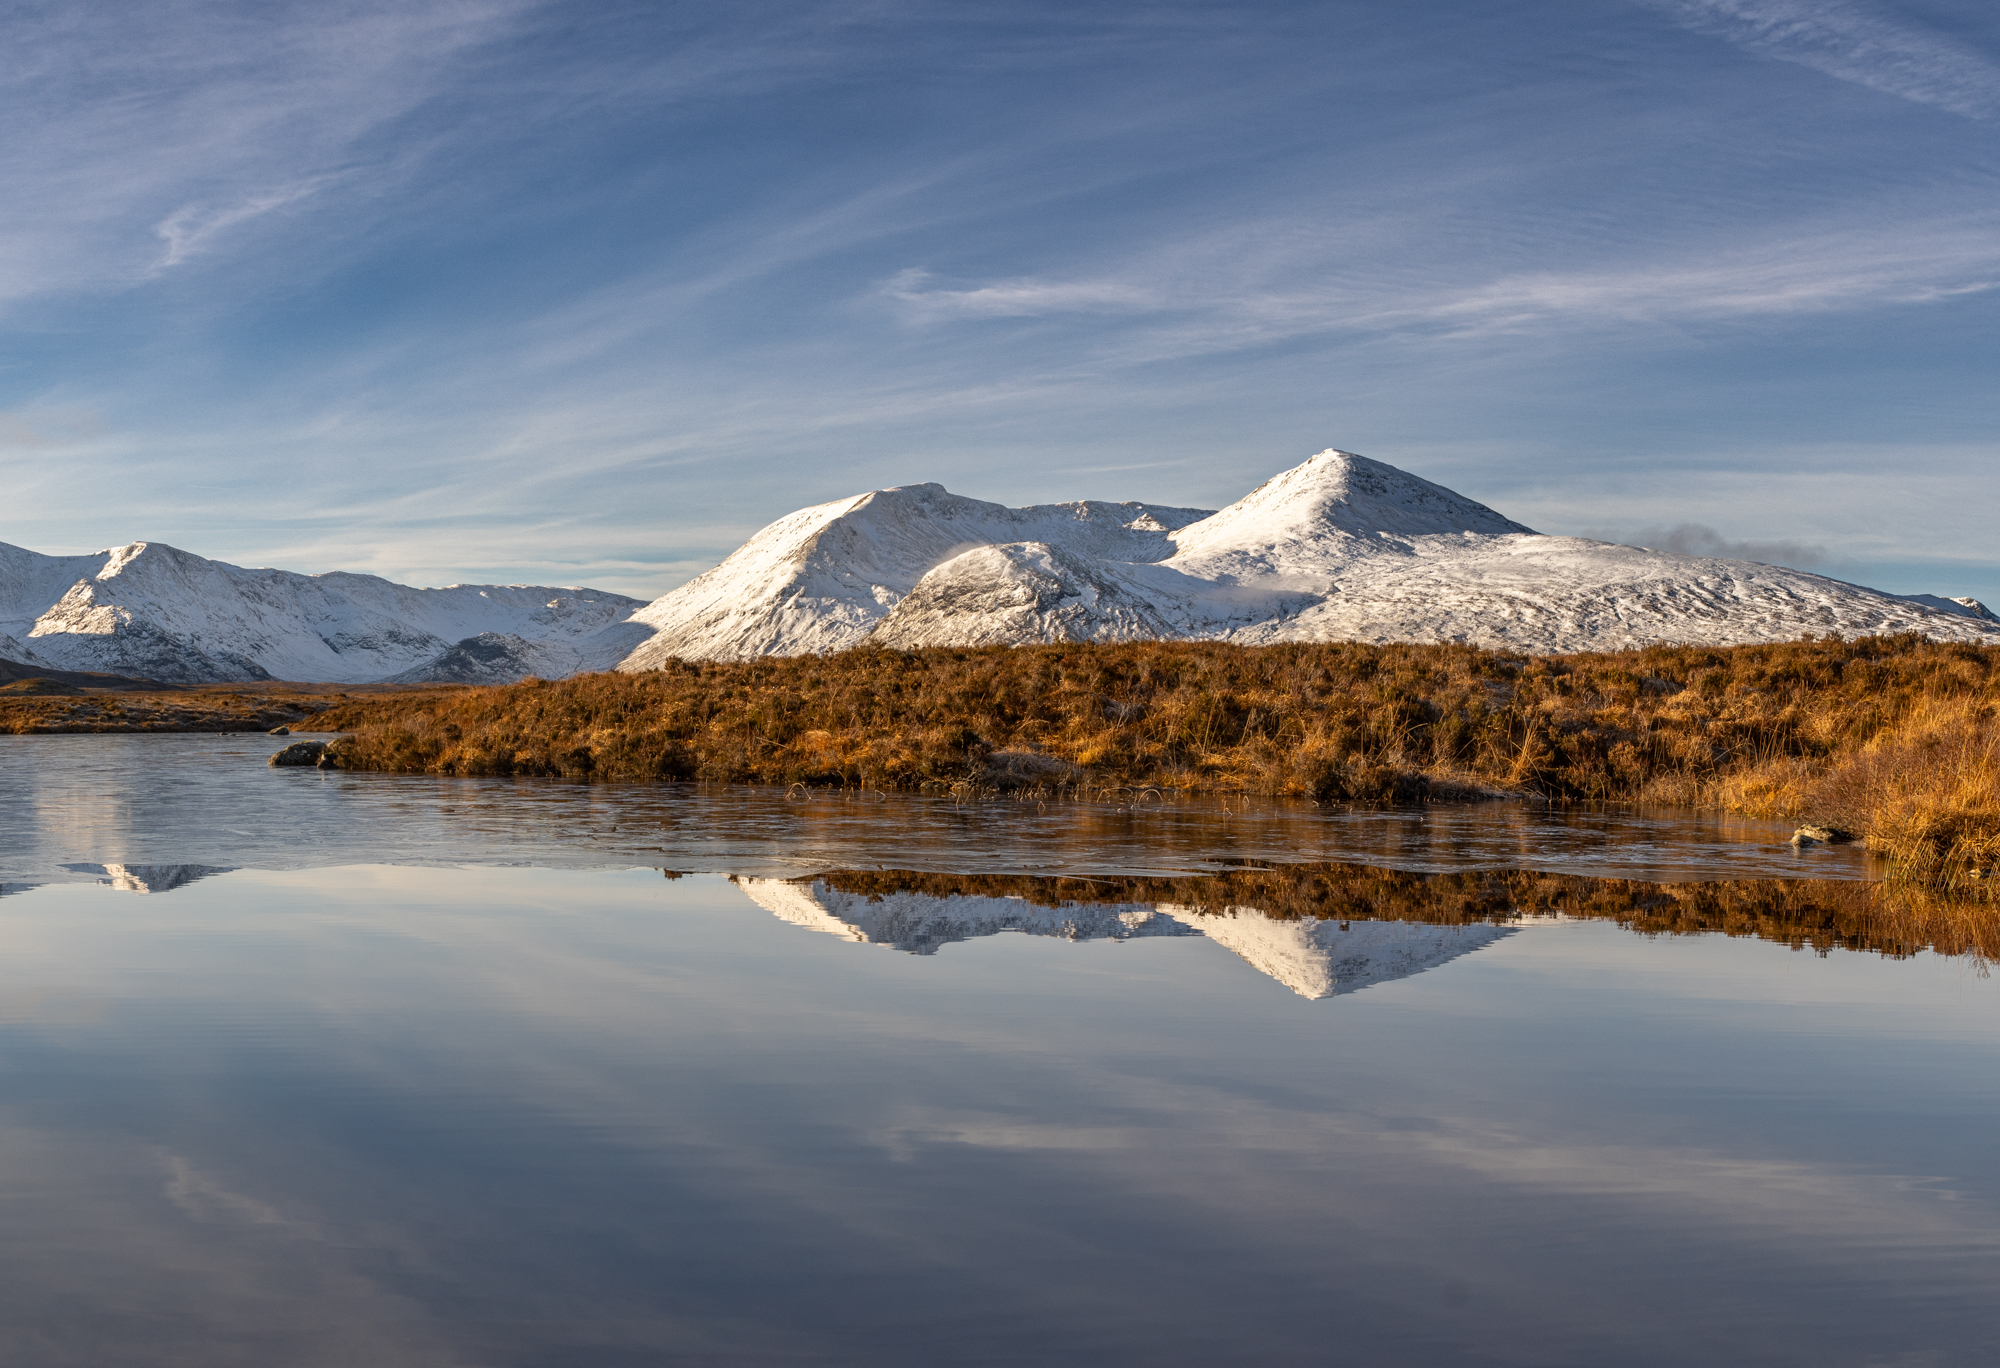
1 Rannoch Moor. Good location as it’s very flat and away from the steep mountains so much less in shade. Plenty foreground to get additional interest. Wellies are a good choice of footwear here as it mostly a big bog although given the freezing conditions the bog had frozen so it was actually pretty easy to walk across.

2 Classic view of Buachaille Etive Mor. The mountain was lit by the sun, but I had to use exposure bracketing to access detail in shady areas whilst not overexposing the highlight areas.

3 Loch Leven and the Pap of Glencoe. With the sun setting in the west, I headed to Loch Leven hoping that I’d be able to find a good composition with the sun still behind me and illuminating part of the landscape looking back eastward.
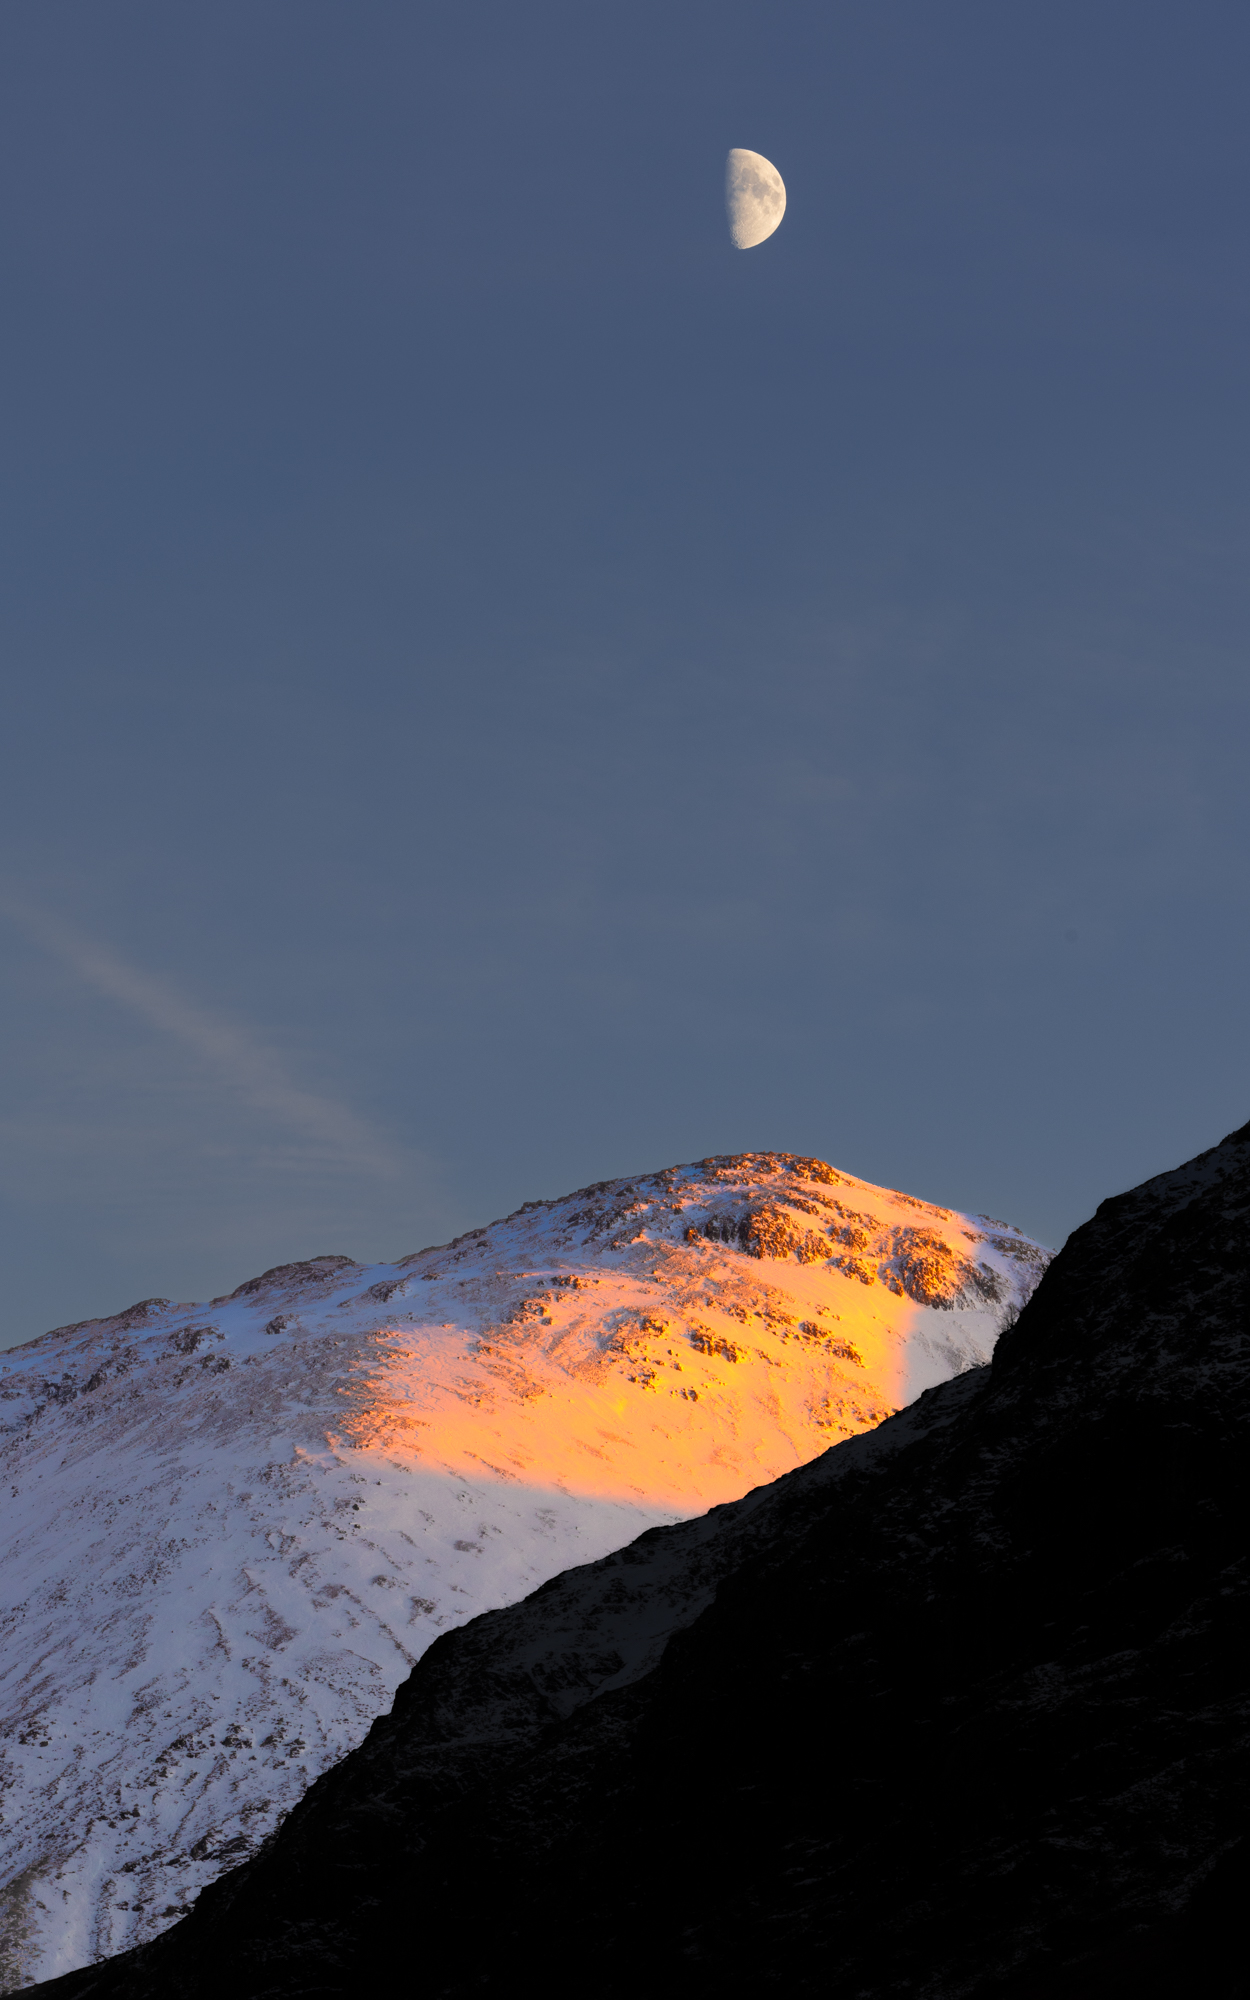
4 Moon over Mountain. Not planned, I just saw the composition while driving to another location. So pulled over and whipped the gear out to catch this.

5 Traffic light trails in Glencoe – see detailed section further below.

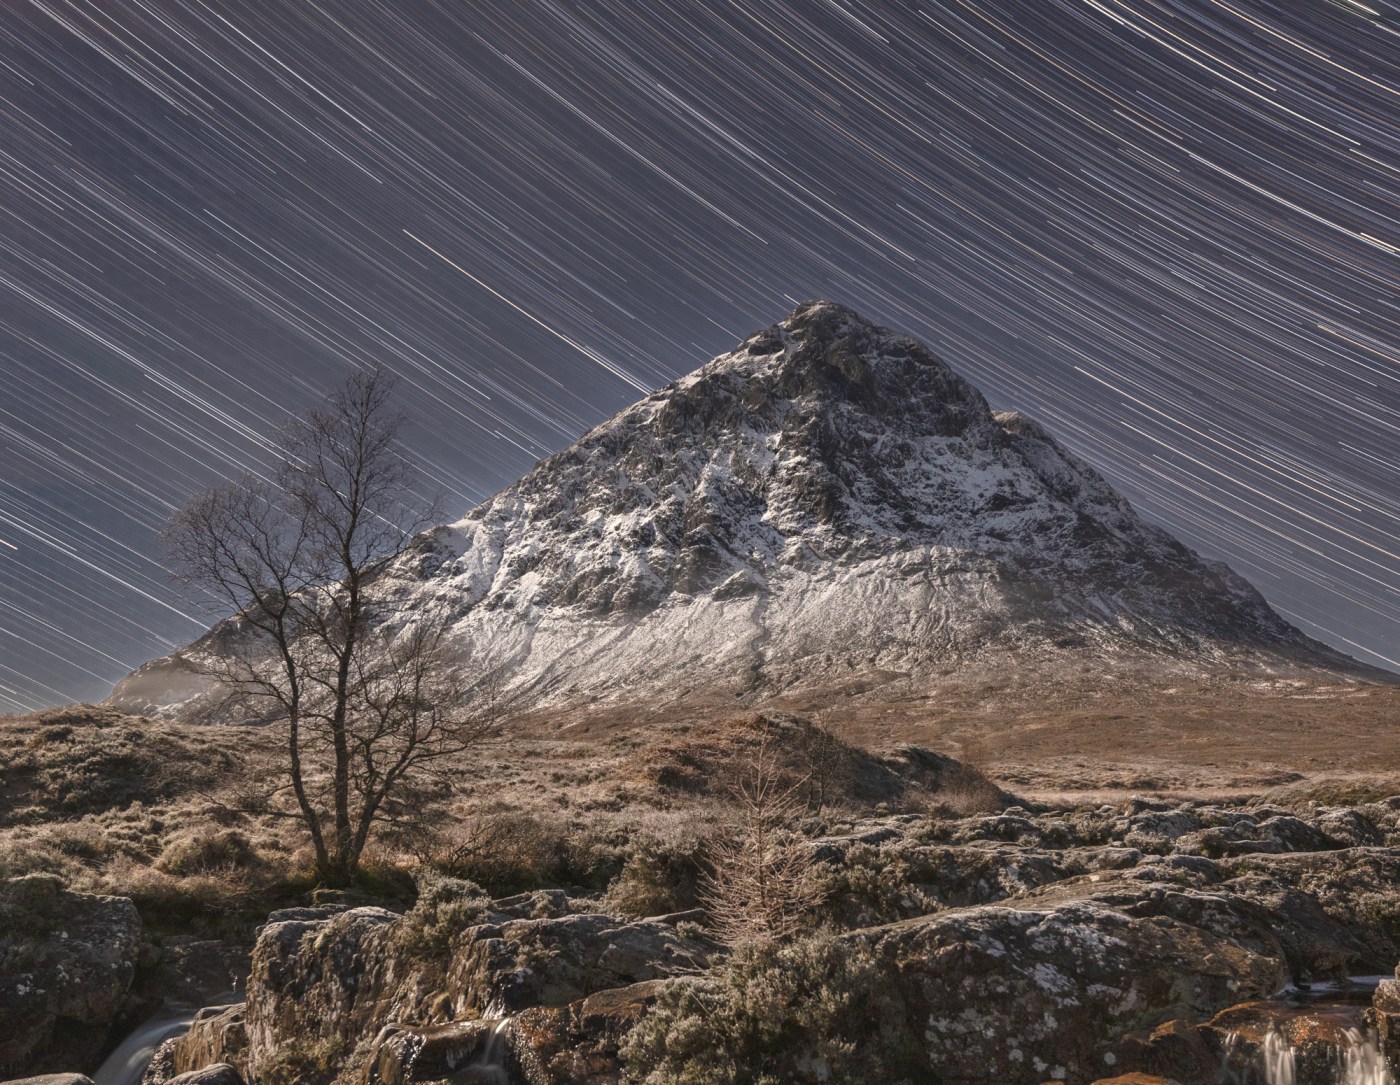
6 Moonlit Buachaille Etive Mor. With the moon super bright, it did a great job of illuminating the landscape so I used it to light up the mountain and set my camera up to record about 100 images over a hour or so to create a star trails effect. (It’s very similar processing to the light trails explained in detail below)

7 Early Morning Inversion. I climbed the hill opposite the Buachaille early in the morning and fortunately got above the cloud level. It was a stunning experience seeing the sunrise and illuminate some of the peaks around.


8 Hoar frost on Rannoch Moor trees. Driving home, I was lucky enough to come across hoar frosted trees on Rannoch Moor. Initially the light was very poor, but I waited for a couple of hours and the sun eventually broke through the cloud and created these amazing light conditions.


Light trails – a bit of detail on the processing
One of the ideas I wanted to shoot was light trails below the Three Sisters – three prominent hills that sit above the road through Glencoe. I’d tried a couple of years ago, but I wasn’t happy with the composition. So, I did a little scouting in daylight and found a few potential locations where I could shoot two of the Three Sisters and that had a nice curve in the road for the trails.
The best time to shoot light trails is at the end of Golden Hour and into Blue Hour when it’s still possible to image the landscape in natural light. It’s a straightforward process that uses long exposure techniques to capture the movement of vehicle lights. In this case I took several images and combined them together during processing.
Settings
Given it’s a long exposure you need a tripod. Once I composed the shot, I set up the camera with a small aperture – f13 to give me a broad depth of field and to ensure the trails would be sharp throughout their length and an ISO of 400. I also used an ND filter to allow for even longer exposures than would have been possible given the amount of ambient light; each one was c.200 seconds.
It’s important to ensure that you also have captured a good image of the surrounding landscape as well as the traffic trails. As there wasn’t a massive amount of traffic traveling through the glen, I ended up taking seven exposures for the traffic trails and a separate image for the landscape which I shot at f4.5 and ISO 4000. Those settings worked well to get some detail in the landscape but they absolutely blew-out the lights, which I knew I could correct for later.
Processing
I imported the images into Lightroom and “de-noised” them using the DXO Pure RAW add-in; though I’m sure Lightroom noise reduction would have worked too. Although the ISO was relatively low, the length of the exposure meant that “thermal noise” crept into the image. This noise is made up of so called hot pixels but using de-noising techniques they are easy to remove. The landscape shot at ISO 4000 also needed de-noised of course.

Next step after cleaning the images up was to import them as layers into Photoshop. This stage allows me to blend the eight images together to create an image containing all the traffic trails that I’d captured. To do that I used the Lighten blend mode in Photoshop which combines layers based on their brightness values. It retains the lighter pixels between the current layer and the layers beneath it while discarding or masking darker pixels in the active layer. The only complexity was dealing with the landscape specific image which I needed to mask to remove the blown out traffic lights. A mask allows you to hide or select part of the image – they are easy to do in Photoshop and even more easily in Lightroom.

I then exported the image to Lightroom to do some more masking to bring out some details in the image; particularly the snow on the peaks. This required me to paint a mask on with a brush then use the sliders in Lightroom to test the effect of increasing the exposure or the whites to make the snow brighter. I did a few other minor tidy ups as well until I was happy with the final image.
Easy as pie!
It turned out to be a successful trip mainly because of the fabulous weather, but also due to the fact that I was aware of locations and importantly paid attention to the light and where the best light might be and then crossing fingers and waiting for it to appear!
Planning and patience are key parts of getting successful images. If you are heading off somewhere you don’t know it’s defo worth doing a little research before you go to see where good locations and compositions might be.
Good luck with your shots!
Dave
Note: all images on this website are copyright of the photographers, please contact us if you want to use any of them.

Please leave a comment - we would love to hear from you.