Haven’t got clue how to do this? Well hopefully the following section will be of help.
Cropping your Photo
Cropping your photo should be done in order to improve the look of your photo and not to achieve the required maximum dimensions stipulated in the competition. For many competitions including Grampian Eye, the shape of the photo is not specified – you can leave your photo as the default shape or crop it to a square, letterbox, or any other shape that suits the photo.
Getting your photo to the correct size (e.g. 1600px x 1200px) required by a photo competition is done when the photo is exported (saved) from an application such as Lightroom or Photoshop.
Adobe Lightroom
Lightroom is one of the more popular photo editing programs, so we’ll do that one first: In the Library module select the image(s) for export. I’m showing just one image selected, but in grid mode (just hit G on the keyboard) you can use the CTRL key (windows) or CMD key (mac) to select multiple images.

Click on the export button on the lower left and you will see the following dialog box:

The important things here are:
- File Settings: JPEG, sRGB, Quality 100, don’t limit file size
- Image Sizing: Resize to Width & Height, W: 1600 H: 1200, don’t worry about the resolution.
- Output Sharpening: Set to Screen and Standard
- Metadata: Copyright only (there is no option to have no copyright, we deal with that later)
- Watermarking: off
You can save these settings as a preset by clicking the Add option at the lower left and name it. It can then be found under User Presets for later use.
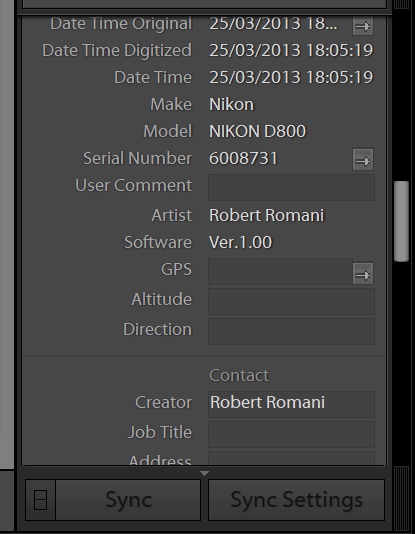
To delete the copyright info from the image outside of Lightroom see here. You can do some limited editing in the library module but only the Creator field. If you have an entry in the Artist field you can’t remove that in Lightroom, as shown below and that entry is exported by Lightroom. So you have to use one of the options discussed on this page.
To rename your image after export: click once or twice on the file name until it turns blue. You can then overtype it with the catchy, humorous or descriptive title of your choice (max 30 characters). The same procedure works on a Mac or if you open it with the Preview app, goto File, Rename..
If you use PhotoShop to export your image(s)
The all in one option is the Save for Web export, it will flatten the image if it has multiple layers, resize, set the jpeg quality, convert to sRGB colour profile all in one place. And it exists in all versions of PhotoShop.

Easy option here is to go to File, Export, Save for Web
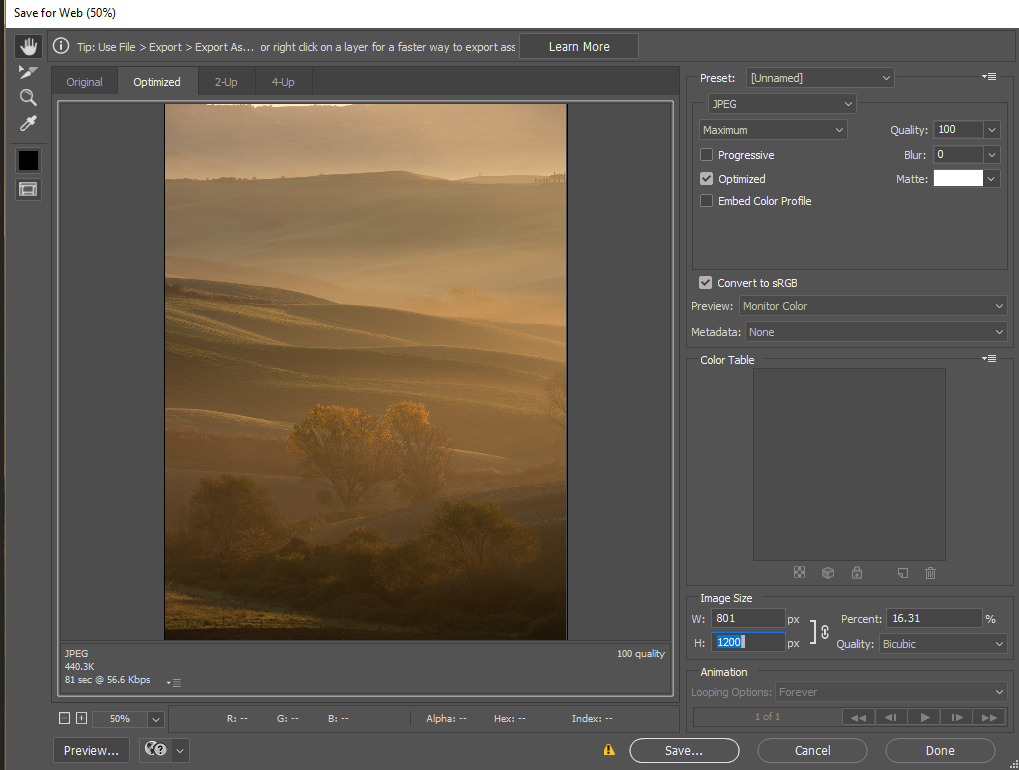
Select JPEG, Maximum or Quality 100, Convert to sRGB, Image size in this case as it is portrait orientation H=1200. The width will be calculated by the software. If it is a landscape orientation then put W=1600, the height will be calculated by the software. Just make sure Width does not exceed 1600 and Height does not exceed 1200.
Metadata : select None, this will remove your name and camera data etc from the exif info in the image.
In the quality box use Bicubic or Bicubic Sharper which sharpens a bit when the image is down sampled which can lose a bit of sharpness.
To rename your image after export: click once or twice on the file name until it turns blue. You can then overtype it with the catchy, humorous or descriptive title of your choice (max 30 characters). The same procedure works on a Mac or if you open it with the Preview app, goto File, Rename..
Apple’s Photo Application
You may choose to give your photo a title in Photos and this can be used as the filename when exporting. To do this click under the photo in your photo album and type the filename.


Again the fiile will still have all the data in the exif header, so see the section:
To delete the copyright info from the image see here.
