Walking the dog on a lead and doing a bit of landscape photography with a tripod can sometimes be a bit difficult. So instead I often take a camera with a compact zoom in a small backpack, just in case there is something to point a camera at. But on this occasion all I had was my new iPhone. It was late in September 2023 when this photo was taken and not the best time of the day either, 13:23 to be precise. I used the raw setting to maximise the pixel count and editing leeway. Here is the un-edited raw file as it shows up in Lightroom Classic.

The white balance is a bit on the cool side here, the foliage looked a bit more yellow after a dry summer than the camera recorded it. So first step is to change the white balance to make the scene look more like I saw it.

Lets try setting the white balance to daylight. Already looks better, but we can push it a bit more.

Increased yellow and pushed tint towards magenta from +10 to +35 to create a warmer image.

Not that keen on the 4×3 ratio so changed it to 16×10. Moved it down a bit to exclude more of the bright sky at the top.
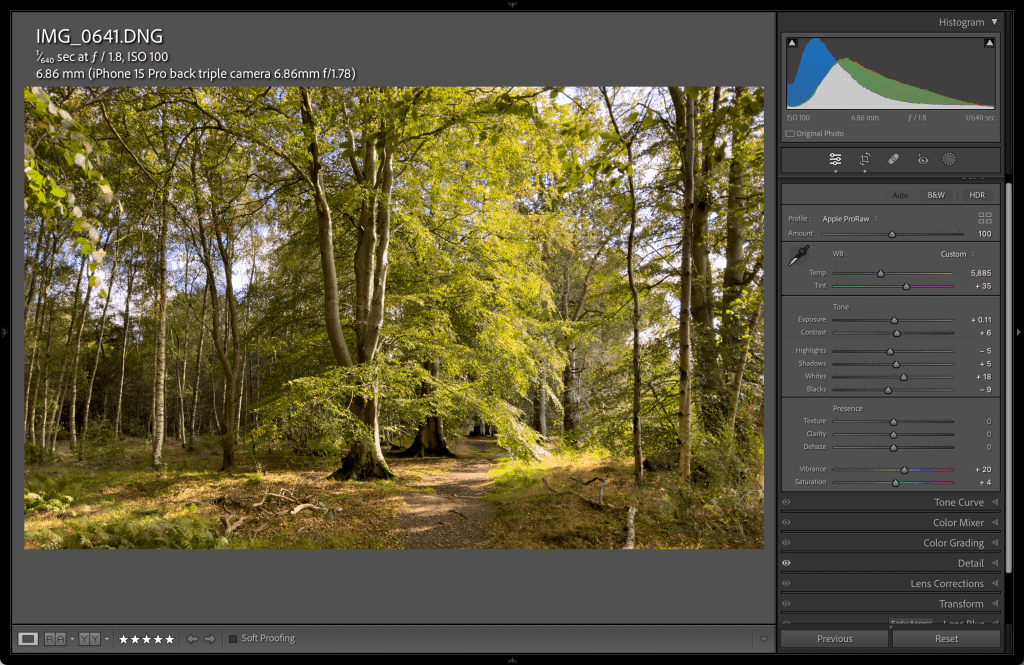
Let’s see what happens when we hit the auto button. Noticeable increase in saturation, it makes the image overall pop a bit more. If you don’t like what it does, you can just hit ctrl z on a PC or cmd z on a Mac to undo. But often it is not bad as a basis to start from.

Now for something different: reduced clarity to give a softer look.

I have clicked on the two small squares in the histogram window to check for blown highlights and blocked shadows. At this stage I want to retain as much of the data as possible. The blacks are ok, just a few small patches, but the bright sky is distracting so next step is to pull the highlights back.

Most of the clipping has now disappeared.

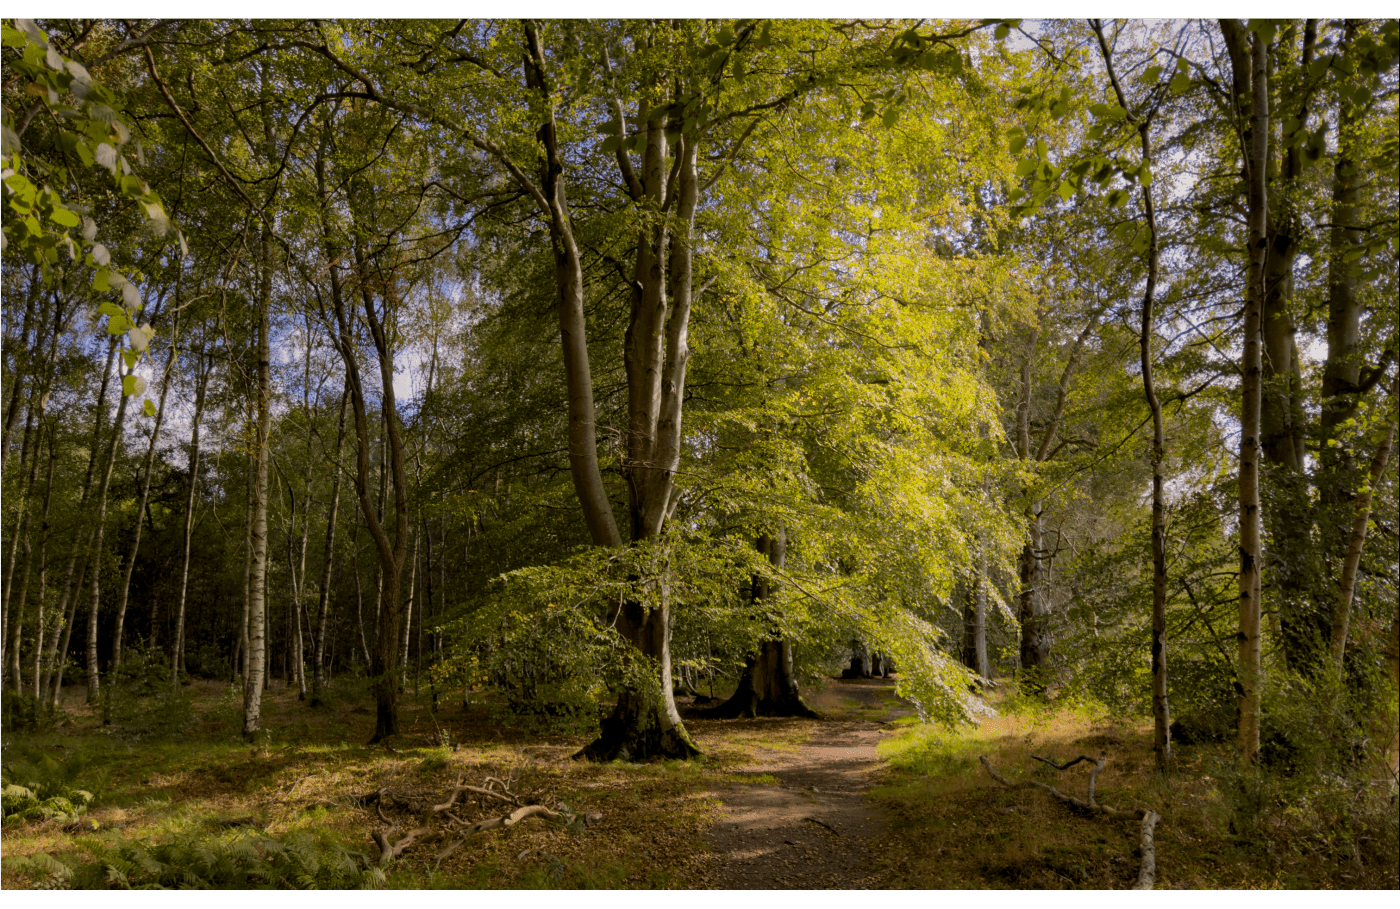
Now for a bit of local editing: after clicking on the masking button, I’ve selected a radial filter and dragged over the area of the sunlit foliage. I want it to stand out more.
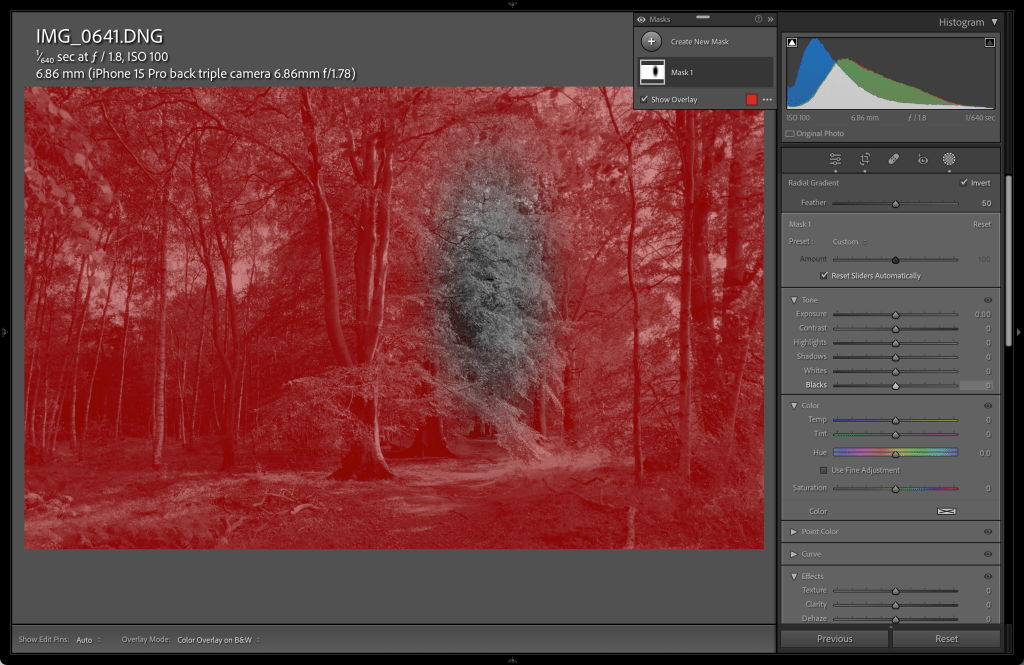
Clicking on the invert button near the top right, swaps the mask from the tree to everything else.

We have now reduced the exposure in the masked area by 59%, effectively highlighting the tree foliage .


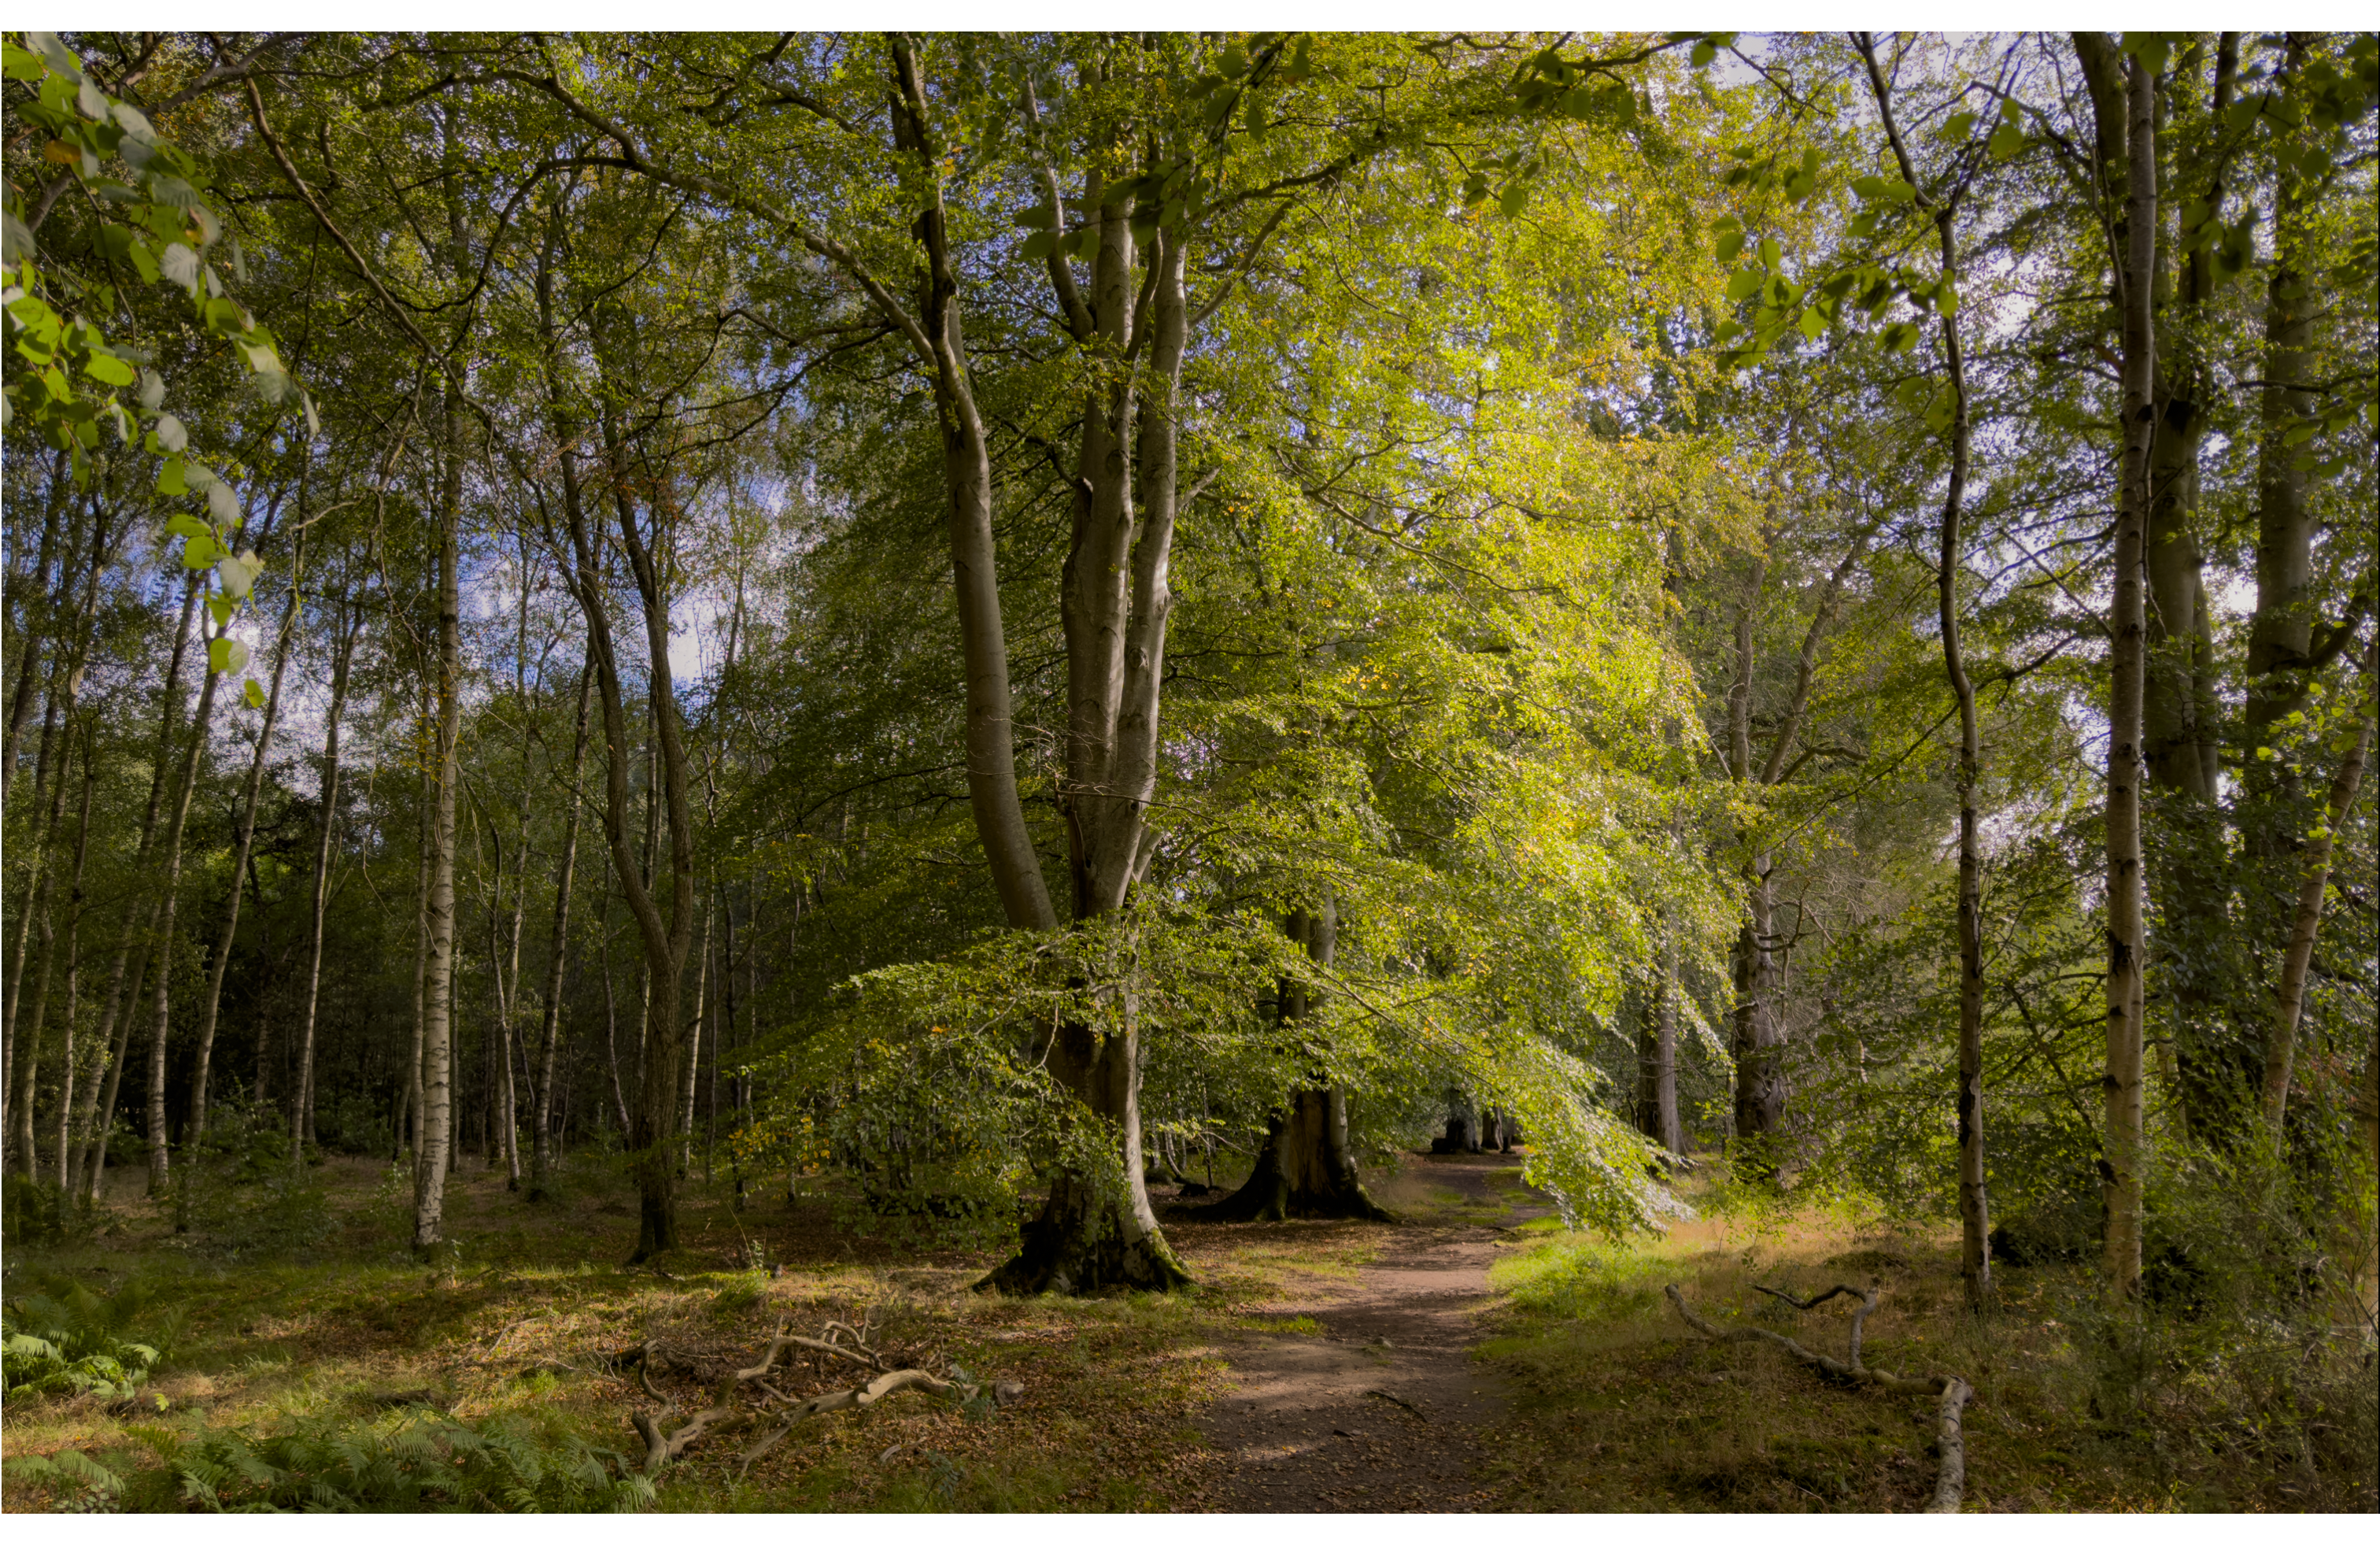
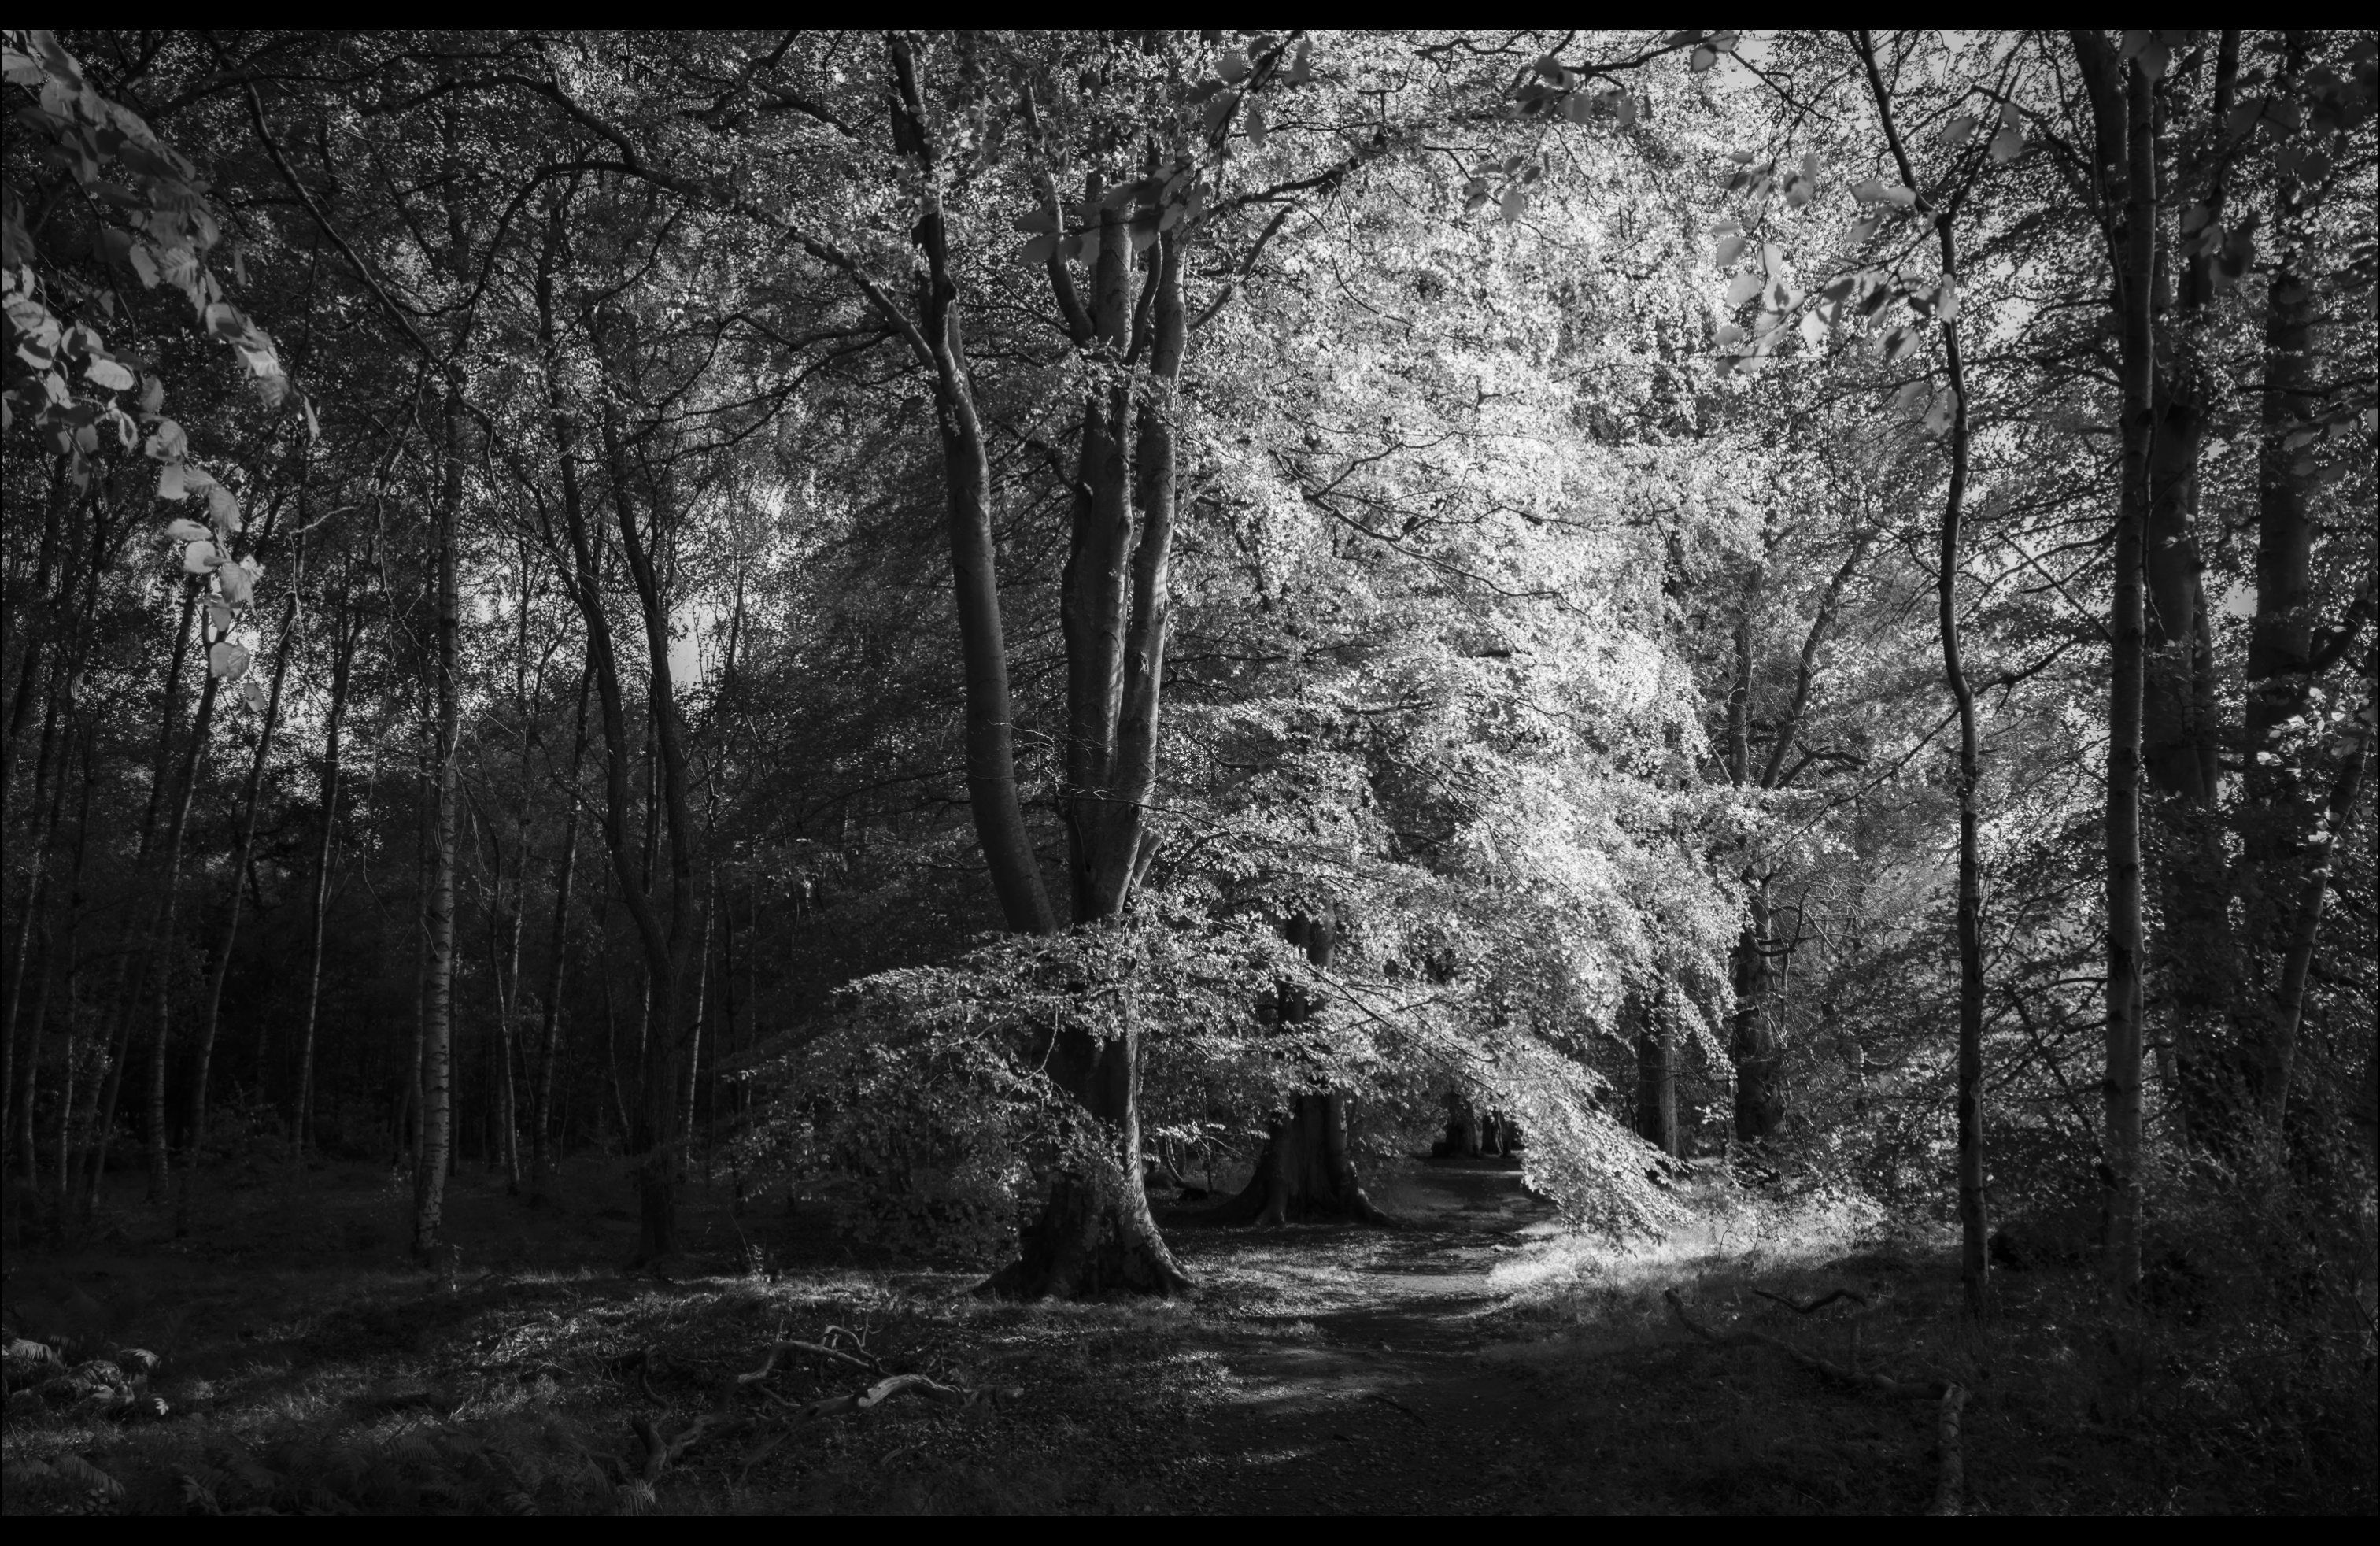
A few more variations of the same original are below.